:: VW T5 'Transretro' 2009-2010 ::
Recent times have seen quality and pride replaced with mass-produced, soul-less products that are designed to self destruct after a short time. British Craftsmen are being replaced by Chinese robots.
The experience of buying and owning what appeared to be a stunning new production camper van but turned out to be a very expensive rust bucket was incentive enough to want to rebel against mass produced, highly priced, poorly constructed products.
The experience of buying and owning what appeared to be a stunning new production camper van but turned out to be a very expensive rust bucket was incentive enough to want to rebel against mass produced, highly priced, poorly constructed products.
We wanted to create a camper van that had the heart and soul of the old VW Splitties and Bays, but in a vehicle that was ultra-reliable... http://karvestuff.blogspot.co.nz/
This entirely Handbuilt Camper took 3 months of 6 days a week to produce. It is insulated with sheeps wool, has waterproof non slip rubber flooring. Hidden Surfboard storage. Sleeps two in a wide double bed. A Rear outdoor/indoor cooking set-up and covered rear doors courtesy of a unique awning we designed and made.
 |
| Table leg storage under an Ash plinth |
 |
Rear Cooker and storage unit, aluminium heat and splash guard |
 |
"Esky" Retro Snap-On imitation tool box
|

Clean lines and easy to set up the bed. Hidden board storage means no boards on the seats...
This unit is made from individual strips of plywood, cut into pie shapes and laminated together The process took almost a week. We had these unique brass badges handmade.
 |
Rear under seat storage |
 |
Barometer, clock and tide clock
|
| Hidden board Storage |
:: 'Transretro' Construction ::
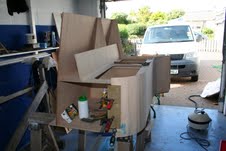
These images show some of the work that went into producing this show winning van. Each part was made, checked to fit and dry fitted before it was all disassembled and varnished.
We started with a stock panel van. The layout was worked out on the floor. The floor levelled and routed out.
Sheeps wool and lining...
Rear door units getting construted
Bare wood in all its raw beauty...
and a finished door unit.
Preparing the corner unit. Note the access holes for discreet storage. This framework was then used to create the striking corner seen above.
Each panel was finshed including varnishing before being carefully constructed in situ; glued and pinned.
Note the ladder bar construction for support of the long seat. Also the ply lining behind which is sheepswool insulation. Once the main vertical panels were fixed in place the flooring was laid. Afterwhich the horizontal panels were glued and pinned. The insides of eah box was lined with carpet to protect the wood and whatever was sored inside.
:: VW T5 Experimental Conversion 2009 ::
This van was the trial run for the vehicle interior above. It was an experiment with the materials and layout to see what could be achieved.
The units were built in 3 independent sections which were then bolted into the van allowing for them to be removed and installed in another vehicle. Note the curves in this van were all steamed and laminated in place.
The checquered floor harks back to the old skool VW's. Colour was minimalistic...black and white
These support were dropped into place and the rear seat back laid across them to make the bed.
The rear seat was reversable enabling the tail gate to be made use of as a shelter from rain and allowing the rear of the van to give a commanding view when parked at the beach.
The central compartment houses two wetboxes for wetsuits and other equipment.
The long worktop is also baord storage for up to 3 boards standing on their rails. This is fully felt lined for proetcion of the boards. The curved door allows access to the board box. There is additional storage under each seat unit
We learned alot from this van and applied that to the vehicle above which went on to win 3 shows for best interior and best T5...
:: Construction::
These images go some way to show the amount of work involved in creating this interior. Many hours of thought and labour are behind such a conversion.
Seats made from horizontals and vertical sections of plywood with zero framing. Instead a channel is routed into the ply into which the upright sits. This is then glued and pinned
Affixing the steamed plywood corner,
The rear seat unit showing rear access and underseat storage. This was the first trial at using the plywood end grain to acheive an artistic effect and neat corner.
Bed base sits between the two seating units.


No comments:
Post a Comment